Setup & Installation
Get Hyperborea running on your machine. Hyperborea is free and open source — there's no account to create. This guide walks you through downloading the software, preparing your console, installing over ADB, and verifying the connection.
Step 1: Download Hyperborea
- Go to the Download page and grab the Hyperborea ZIP.
- Extract the ZIP to a folder on your computer. It contains the Hyperborea APK, the installer scripts (
deploy.sh/deploy.ps1), and offline copies of the response-code solver.
You'll run the installer from this folder later, in Step 8.
Step 2: Prerequisites
Before you begin installation, make sure you have:
- An iFit-based machine (NordicTrack, ProForm, or FreeMotion) with an Android-based touchscreen console (2019 or newer models with Android touchscreens)
- A reliable Wi-Fi network that the console can connect to
- A computer (Mac, Windows, or Linux) connected to the same Wi-Fi network the console will use
- ADB (Android Debug Bridge) installed on your computer (see below)
- A paperclip or SIM ejector tool for pressing the console's pinhole reset button
Installing ADB
ADB is a command-line tool that lets your computer communicate with the console over your Wi-Fi network. Install it using one of the methods below for your operating system.
macOS:
With Homebrew:
brew install android-platform-tools
Or download Platform Tools directly from Google and extract the ZIP.
Linux:
Debian / Ubuntu:
sudo apt install android-tools-adb
Fedora:
sudo dnf install android-tools
Arch:
sudo pacman -S android-tools
Windows:
With winget:
winget install Google.PlatformTools
Or download Platform Tools directly from Google and extract the ZIP.
Tip: New to the command line? MDN has a great introduction to the command line to help you get started.
Note (Windows): If you see an error about script execution being disabled when you try to run the installer later, you may need to adjust your PowerShell execution policy. The install command in Step 8 already handles this, but if you run into issues, see Microsoft's about_Execution_Policies documentation.
Step 3: Factory Reset
Factory resetting the console wipes all iFit data and returns it to a clean state. This is required so you can connect to Wi-Fi without iFit locking down the system.
These steps have been verified on the NordicTrack S22i. The process should be similar on other iFit-based consoles, but the pinhole location may vary by model.
- Power off the machine completely using the power switch.
- Locate the pinhole reset button on the edge of the console. On the S22i, it's on the left edge of the display. On other models, look for a small pinhole along the top, bottom, or side edges.
- Insert a paperclip or SIM ejector tool into the pinhole and press and hold the button inside.
- While still holding the pinhole button, power on the machine.
- Keep holding until you see recovery text appear on the screen, then release the button.
- Wait 3-5 minutes for the console to complete the factory reset and reboot. It will eventually land on the iFit onboarding/welcome screen.

Can't find a pinhole? Try skipping ahead to Step 5: Enter Privileged Mode first. If privileged mode works, you can factory reset through Android Settings > System > Reset options instead. If you're stuck, ask for help in our Discord.
Step 4: Connect to Wi-Fi
After the factory reset, the console will boot to the iFit welcome/onboarding screen.
- Tap Next on the welcome screen.
- Select your Wi-Fi network and enter the password.
- STOP immediately once Wi-Fi is connected. Do not continue the iFit onboarding process.
Warning: Do not proceed past the Wi-Fi step in iFit's setup. If you continue, iFit may download a firmware update that disables privileged mode, which would require another factory reset.
Step 5: Enter Privileged Mode
Privileged mode grants the access needed to install Hyperborea as a system app. The activation sequence is:
- Tap anywhere on the screen 10 times quickly (within about 3 seconds).
- Wait 5-10 seconds. This pause is important — wait at least 5 seconds, but no more than 10.
- Tap 10 more times quickly (within about 3 seconds).
After the second set of taps, one of two things will happen:
- "Privileged Mode Enabled" toast message appears at the bottom of the screen. You're all set — skip ahead to Step 7.
- A dialog with a challenge code appears. Continue to Step 6 to solve it.
Nothing happened? Wait a moment and try again. The timing can be finicky. You can retry as many times as you need — there is no lockout.
Step 6: Solve the Challenge Code
If the console displayed a dialog with a challenge code instead of enabling privileged mode directly, you need to solve it to continue.
- On your computer or phone, open the response code solver.
- Enter the challenge code shown on the console's dialog.
- The solver will give you a response code.
- Type the response code back into the dialog on the console and confirm.
Tip: The Hyperborea download ZIP (from Step 1) also includes offline solver scripts if you prefer not to use the web tool.
Step 7: Enable Developer Options & ADB
Now that privileged mode is active, you need to enable ADB so your computer can connect to the console.
- Swipe up from the bottom edge of the screen to reveal the Android navigation bar (Back, Home, and Recent buttons).
- Tap the Home button, then open Settings.
- Go to About tablet and tap Build number 7 times. You'll see a message confirming that Developer options have been enabled.
- Go back to Settings > Developer options and enable USB Debugging (this also enables wireless ADB).
- While you're in Settings, note the console's IP address: go to Settings > About tablet > Status and find the IP address. You'll need it if the install script asks for it.
Step 8: Run the Installer
- Open a terminal (or PowerShell on Windows) and navigate to the folder you extracted the Hyperborea ZIP into back in Step 1.
- Run the deploy script:
macOS / Linux:
bash deploy.sh
Windows:
powershell -ExecutionPolicy Bypass -File deploy.ps1
The script will connect to your console over the network, install the Hyperborea APK as a system app, and verify the installation. Follow any prompts that appear.
Step 9: Verify the Connection
Once installation is complete:
- The console app will show the Hyperborea dashboard with live metrics.
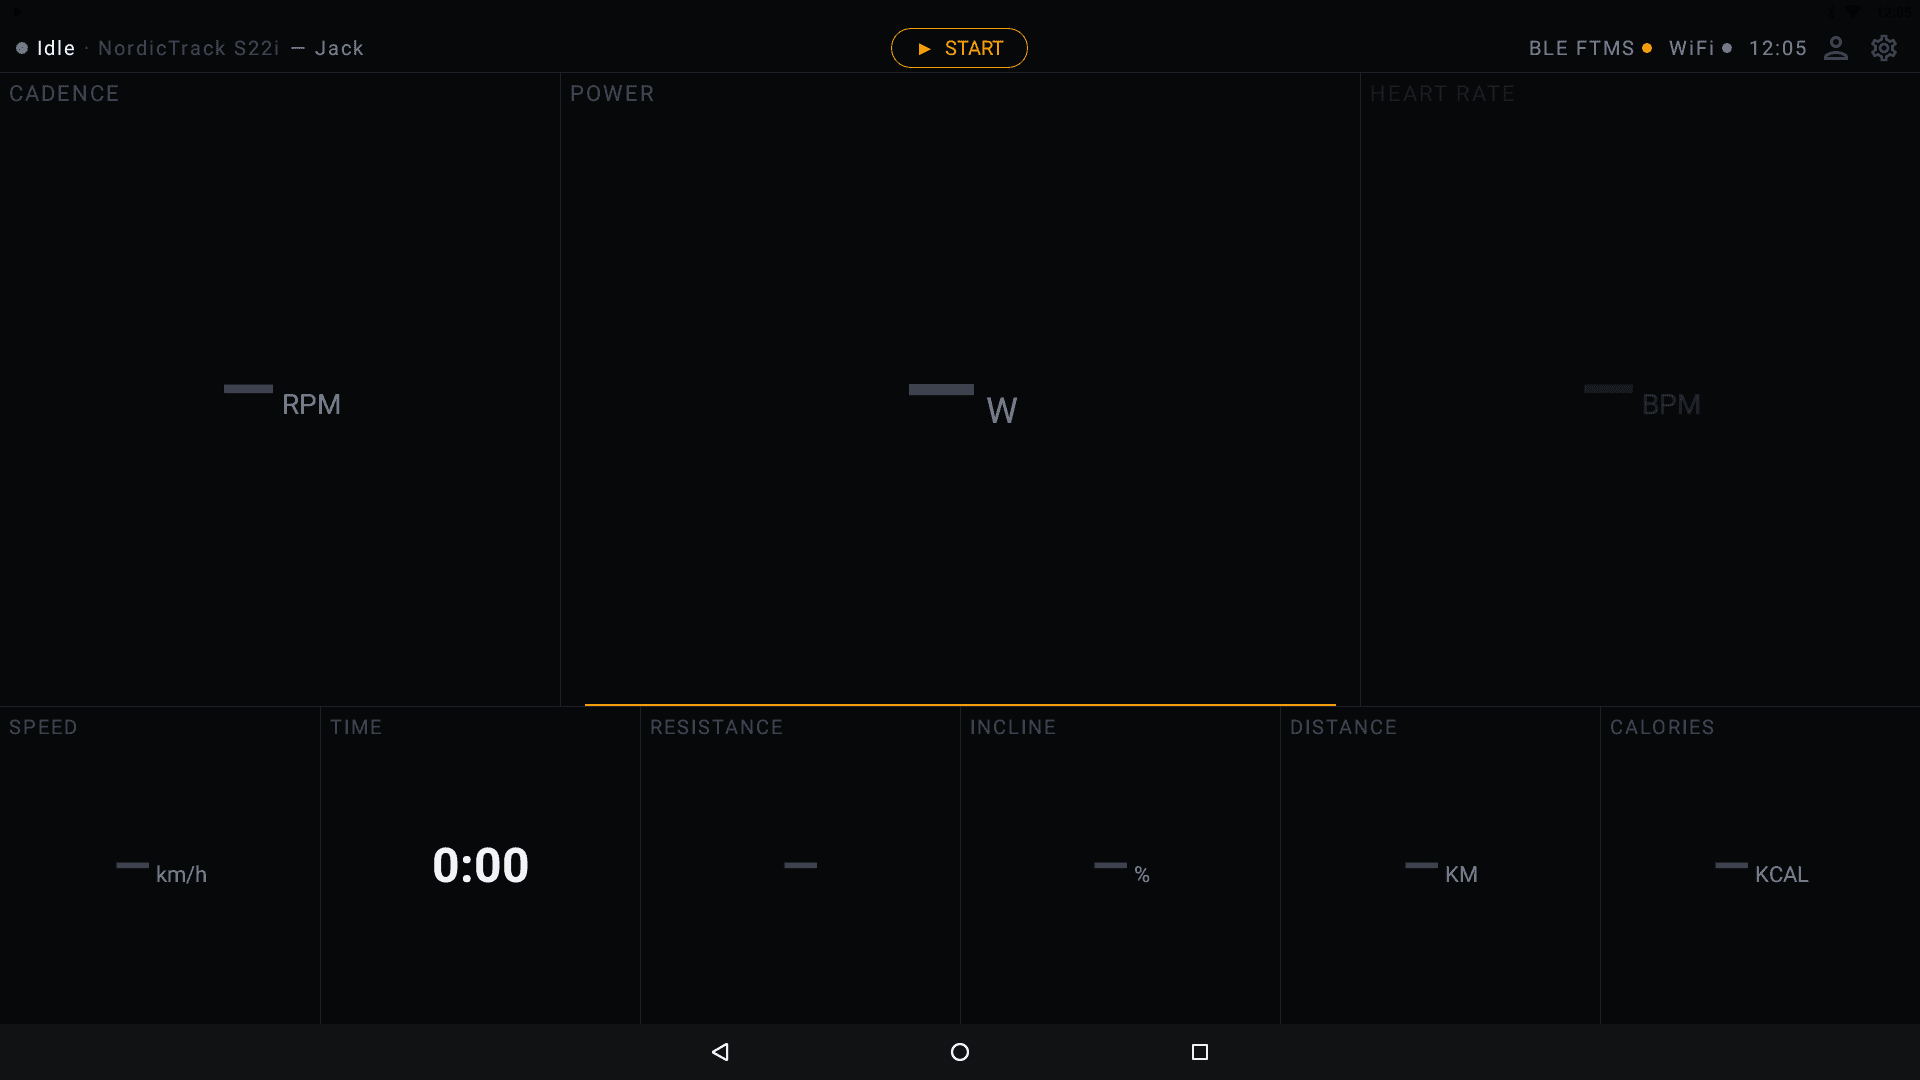
- Open your preferred fitness app (Zwift, Wahoo, Rouvy, etc.) on your phone, tablet, or computer.
- Scan for Bluetooth devices in the fitness app. Your machine should appear by its detected name as an FTMS-compatible device. You can change this name in Device Configuration.
- Select it and start a workout to confirm that metrics like power, cadence, and speed are being transmitted.

Auto-Updates
The Hyperborea APK updates automatically whenever the console has a Wi-Fi connection. You do not need to manually download new versions. Updates install in the background and take effect the next time you open the app.
If an update fails to install, check that your Wi-Fi connection is stable. See the Troubleshooting guide for more help.